
With the holidays on their way, what could be more fun than creating your own Miffy tree ornament! Miffy likes to make her festive masterpieces with the help of Father Bunny, so make sure to get a parent or guardian to supervise as you get creative.
- Gather your materials

To make your adorable Miffy ornament, you will need:
- A pair of scissors
- One sheet of white felt
- One sheet of red felt
- A darning needle
- Green yarn or thick thread
- Decorative twine
- Holly decorations (optional)
- Stuffing
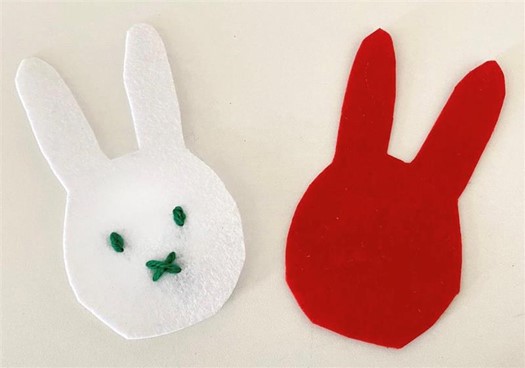
2. Cut out your Miffy shapes

First, you will need to trace Miffy onto both pieces of felt. If your feeling artistic you can do this freehand, but you can also ask your parent or guardian to print out a template for you. It’s important that both Miffy-shaped pieces of felt are the same shape and size. You can then carefully cut out your bunny design.
3. Creating Miffy’s features
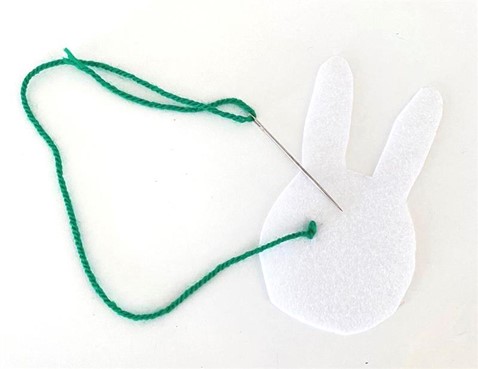
This is where Miffy comes to life! You should make sure to complete the next few steps with the help of your parent or guardian. With a pencil, mark where you want Miffy’s eyes and mouth. Then thread your needle with your green yarn and create the eyes by going over a simple stitch a few times. For the mouth, simply stitch a cross!
4. Stitching the ornament together
For this step, use more green yarn and a blanket stitch to sew together both pieces of felt. Make sure the sides of the felt you want on show are facing outwards. Before your finish sewing, leave a gap to stuff your ornament – you may want to use a pencil to push the stuffing into Miffy’s ears. Then, you can finish sewing up your ornament to keep the stuffing secure inside.

5. Final touches!
To complete your cute new ornament, simply attach some decorative twine in-between the ears using your needle and tie with a bow.
Congratulations! You have created your very own Miffy ornament. Now all that’s left to do is find the perfect spot on the tree for your adorable masterpiece!

